CrunchBang is an excellent version of Linux to run in VirtualBox due to the fact that it’s a nimble Openbox Linux distribution. That being said, the OS still requires tweaking after install in a VM to get the most performance and satisfaction out of it. I’ve put together this guide to walk one through the installation and optimization settings. If not already done, take this opportunity to grab the requisite softwares:
- VirtualBox 4.3.8 (recommend grabbing VirtualBox extension pack also)
- CrunchBang Linux (recommend the 32-bit non-PAE)
Here’s a direct link to the CrunchBang Linux torrent.
And here’s a direct download to the CrunchBang Linux ISO.
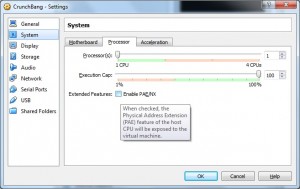
You can download the standard PAE-enabled version also, but there is no need for this in a virtual environment (and you’ll have to enable PAE in the VirtualBox settings for it to work). According to WikiPedia:
“In computing, Physical Address Extension (PAE) is a feature to allow 32-bit IA-32 central processing units (CPUs) to access a physical address space (including random access memory and memory mapped devices) larger than 4 gigabytes.”
After installing VirtualBox (I recommend accepting defaults during install) fire it up and then browse to and double-click on the Extension Pack downloaded earlier to install it.
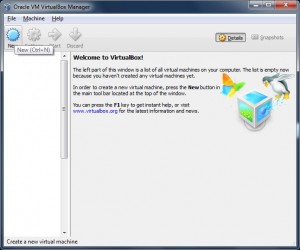
Create a new virtual machine (click on the big blue New icon in the top toolbar of the Oracle VM VirtualBox Manager or use keyboard shortcut Ctrl+N):
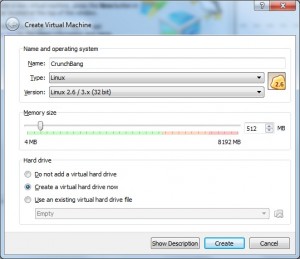
In the Create Virtual Machine Wizard, click on the Hide Description button at the bottom and use the screencap below to fill in appropriate settings for the VM (bump memory up to 512 MB from the 256 MB default if you’ve got it to spare):
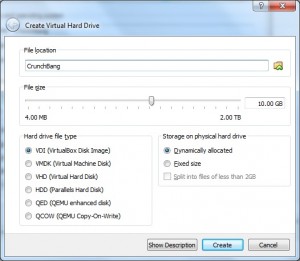
Click Create to move on to the virtual hard drive wizard (bump drive size up to 10 GB from the 8 GB default–don’t worry, it’s dynamic so the space is only utilized as needed):
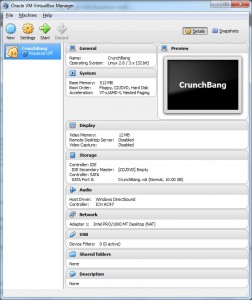
Let’s take a look at what we’ve got:
We’re almost ready for the initial boot. Let’s add a description and mount the CruchBang ISO in the virtual CD/DVD drive so that it will boot and let us install. Click on Storage, click on the CD under Controller: IDE and under Attributes click the small CD icon and select Choose a virtual CD/DVD disk file…
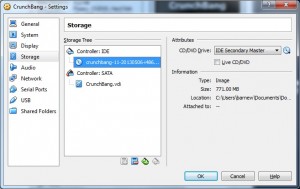
Browse to and select the ISO file that you downloaded earlier and click OK.
NOTE: If you downloaded the PAE version of the CD/DVD, you’ll need to enable PAE (otherwise the VM will not boot) by placing a checkmark in the Extended Features: Enable PAE box under System –> Processor:
Now let’s take a look at the final settings before we boot:
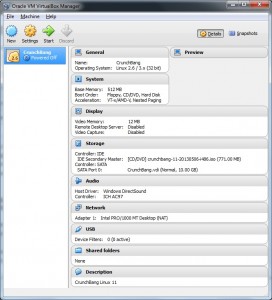
Notice under Storage it shows the mounted CrunchBang ISO that was downloaded earlier.
Also notice under System the accelerations for the CPU and hardware are enabled (you did enable virtualization in your system BIOS, right?)
Now that our virtual machine hardware is set up, let’s start it up and get the OS installed.
Continue to Page 2 — Installing CrunchBang in VirtualBox